한 걸음 두 걸음
Unity 유니티 ] 시선(Gaze , Reticle) 응시점 만들기 본문
–https://developers.google.com/vr/unity/download
Downloads and samples | Google VR | Google Developers
Terms & Conditions By downloading the Google VR SDK, you agree that the Google APIs Terms of Service govern your use thereof. I have read and agree with the above terms and conditions, proceed to the downloads To develop for Google VR, you need a supported
developers.google.com
에서 받아온 Google SDK를 적용시켜준 후
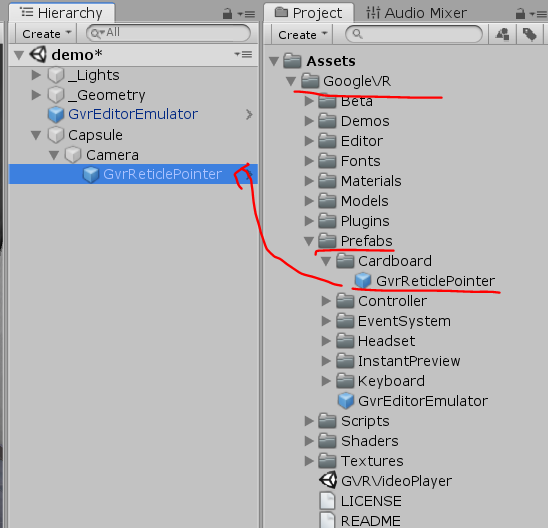
Prefebs - CardBoard - GvrReticlePointer를 Camera에 적용시켜줍니다.
(저는 Cardboard를 사용할 예정할 예정이기때문에)
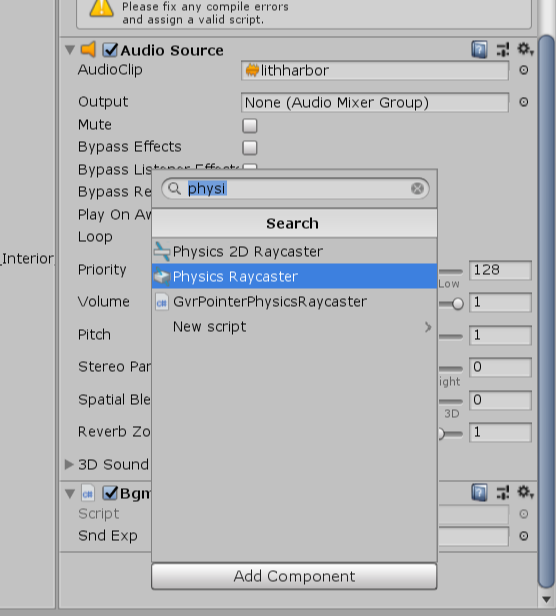
그리고 Physics Raycaster를 적용시킵니다.
여기서, 저는 스크롤바와 시선레티클이 충돌했을 때
스크롤바가 차오르도록 설정할 것이기 때문에
UI로 Scrollbar를 추가해준 후,
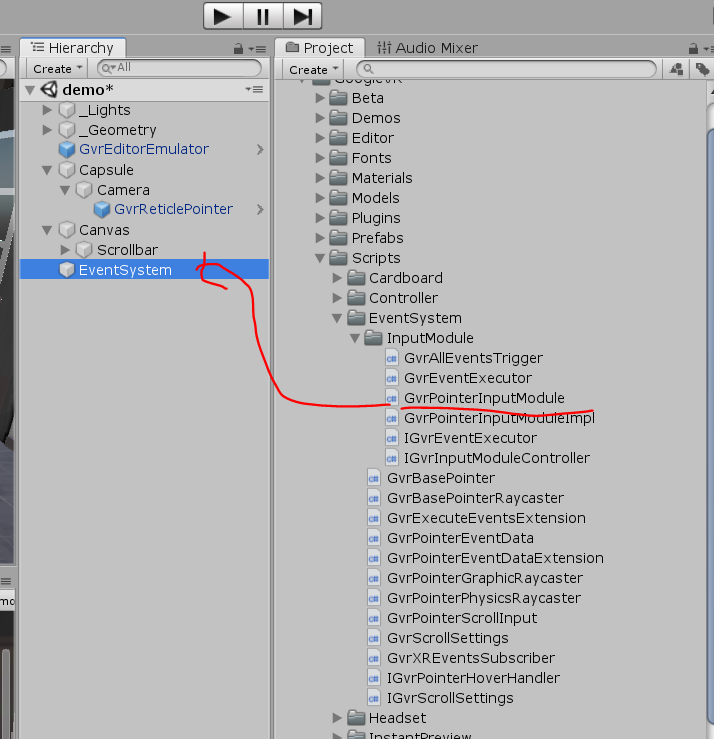
EventSystem에 GvrPointerInputModule을 적용시켜주었습니다.
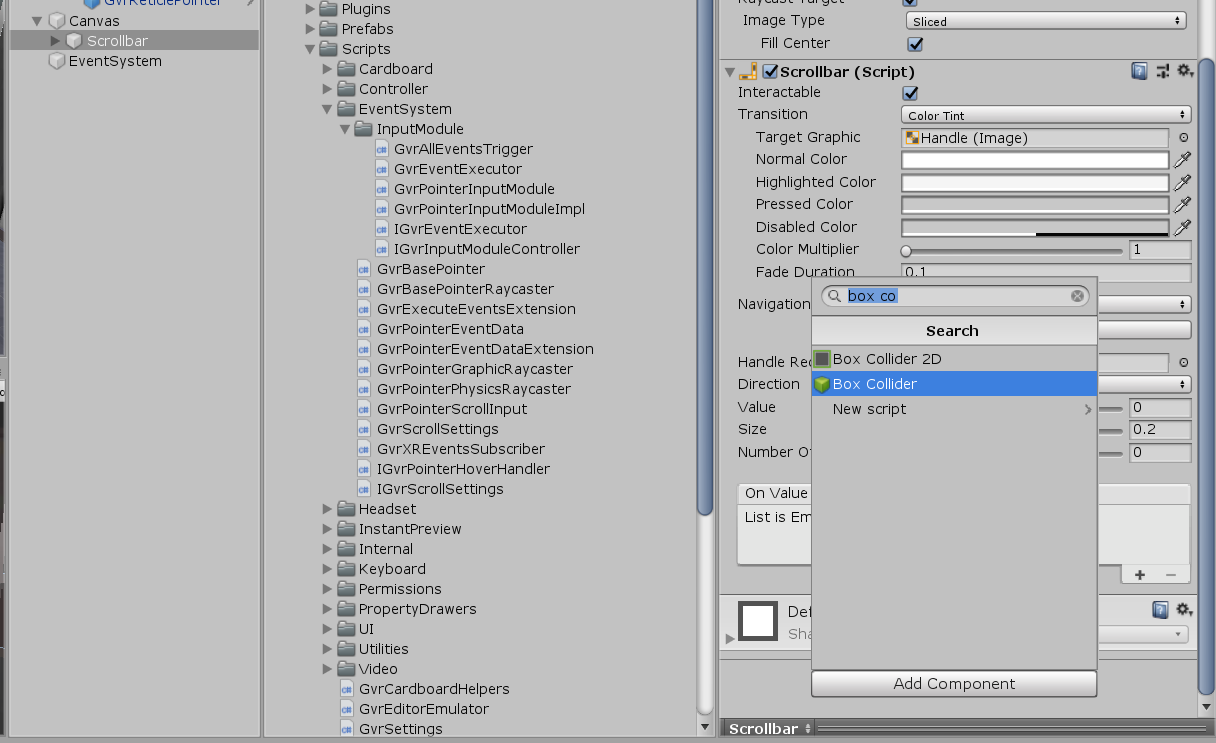
스크롤바엔 충돌하기위한 Collier가 없으므로 비슷한 모양의 Box Collider를 적용시켜주었습니다.
그리고 VRbutton.cs 스크립트를 Scrollbar에 적용시켜서 게임 시작을 위한 인터페이스로 삼았습니다.
using System.Collections;
using System.Collections.Generic;
using UnityEngine;
using UnityEngine.UI;

public class VRbutton : MonoBehaviour
{
    /*  게임이 로딩중임을 알리는 스크롤바와 텍스트를 관리하는 스크립트입니다. */

    public Text label;
    public UnityEngine.UI.Scrollbar obj_scrollbar_;

    public void Start()
    {
        label.text = "At start func";
    }

    private void Update()
    {

    }

    //시점이 스크롤바에 닿으면 작동하는 함수입니다
    public void PointEnter() {
        label.text = "게임 로딩 중";
        StartCoroutine(TimeToAction());
    }

    //시점이 스크롤바를 벗어나면 작동하는 함수입니다.
    public void PointExit() {
        label.text = "다시 시도해주세요";
        obj_scrollbar_.size = 0;
        StopAllCoroutines();
    }

    //애니메이션 발생 효과 함수입니다.
    IEnumerator TimeToAction()
    {
        for (float value = 0.0f; value < 1.0f; value += 0.01f)
        {
            obj_scrollbar_.size = value;
            yield return new WaitForEndOfFrame();
        }
        obj_scrollbar_.size = 1.0f;
        Debug.Log("게임시작!");

    }
}
이제 월드스페이스로 가져온 스크롤바에 시선이 닿으면 스크롤바가 차오르고, 이벤트가 발생하도록 하겠습니다.
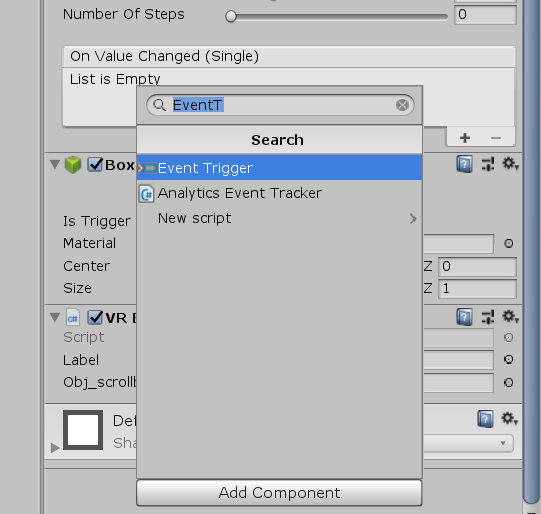
Scrollbar에 Event Trigger를 적용시켜준 후,
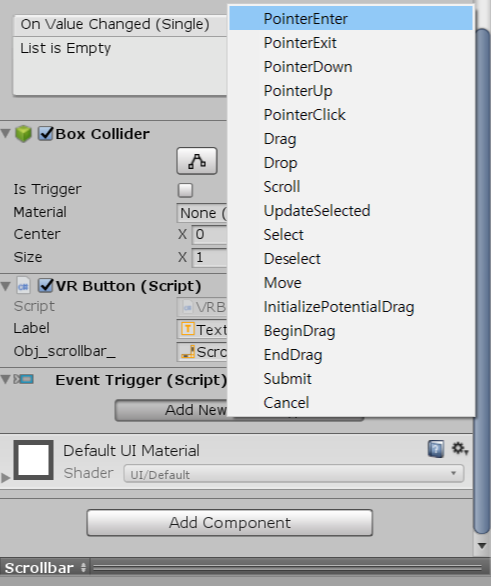
버튼을 두 번 눌러서 PointerEnter / PointerExit을 만들어줍니다.
한 개의 이벤트타입에 두 개를 넣게되면 나중에 마지막 것만 실행되니 주의해주세요.

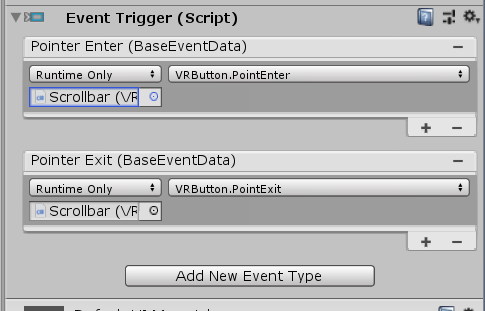
잘 들어갔다면 이런 모습일거에요.
이제 +를 눌러서 다음 단계로 진행해봅시다.

Scrollbar를 끌어다가 적용시켜준 후, Function으로

PointerEnter와 PointerExit을 각각 적용시켜줍니다.
완성입니당ㅎㅎ

저렇게 동그라미(응시점)활성화된 것 보이시죠?ㅎㅎ
'Unity' 카테고리의 다른 글
| 폐쇄공포증 트라우마 극복을 위한 VR프로젝트 (0) | 2019.05.26 |
|---|---|
| 유니티 unity ] 시선으로 이동하기 (샘플) 아직 안해봄~ (0) | 2019.05.26 |
| unity 유니티 ] 타이머 만들기 (0) | 2019.05.26 |
| unity 유니티 ] 시선으로 스크롤바 이벤트 발생시키기 (0) | 2019.05.26 |
| unity 유니티 ] 네비게이션 / 목표물로 향하게 하기 (0) | 2019.05.26 |
